
Home insulation is a critical aspect of maintaining a comfortable, energy-efficient living space. Proper insulation helps in retaining heat during winters and keeping the house cool during summers, leading to significant savings on energy bills. However, detecting areas where insulation is lacking can be a challenging task. This is where thermal imaging technology comes into play.
Thermal imaging cameras provide a unique solution to this problem. By capturing the infrared radiation emitted by objects, these cameras create a visual representation of temperature differences in a space. This technology allows homeowners to easily identify areas of heat loss, making it a vital tool for enhancing home insulation efficiency.
Understanding Thermal Imaging
To appreciate the benefits of thermal imaging in home insulation, it’s essential to understand how this technology works. Thermal imaging cameras detect infrared energy (heat) and convert it into an electronic image that depicts temperature variations. This image, often in vibrant colors, shows hot spots as red or yellow and cooler areas as blue or purple.


The primary benefit of thermal imaging in home insulation is its non-invasive nature. Unlike traditional methods that might require physical inspection and sometimes even demolition, thermal imaging provides a clear picture without any physical alteration to the structure. It helps in identifying hidden issues such as inadequate insulation, air leaks, and moisture intrusion, which are not visible to the naked eye. This not only saves time and effort but also helps in targeting specific problem areas without guesswork.
Common Heat Leak Areas in Homes
Different parts of a house are prone to heat loss, and identifying these areas is the first step towards improving insulation. Common heat leak areas include windows, doors, attics, and walls. Thermal imaging cameras excel in detecting these problem spots by highlighting temperature differences.

For instance, windows and doors might show as warmer areas due to air leaks around their frames. Similarly, a poorly insulated attic can be easily identified when the thermal camera shows heat escaping through the roof. These images help homeowners understand where to focus their insulation efforts for maximum impact.
Review of Thermal Imaging Cameras
ACEGMET TR120E Thermal Imaging Camera


- Features and Specifications:
- 120×90 IR resolution with 10800 pixels.
- Refresh rate of 25 Hz and a temperature range of -4°F to 752°F.
- Equipped with a laser pointer and a 2.4″ LCD screen.
- IP54 rating for dust and water resistance.
- Pros and Cons:
- Pros: High-resolution imaging for detailed views, robust build quality, and a wide temperature range.
- Cons: Relatively lower pixel count compared to some higher-end models.
TOPDON TC004 Thermal Imaging Camera


- Features and Specifications:
- High IR resolution of 256×192.
- 12-hour battery life and supports PC analysis and video recording.
- Comes with a 16GB Micro SD card for storage.
- Pros and Cons:
- Pros: Long battery life, high-resolution imaging, and additional PC analysis capabilities.
- Cons: May be more complex for casual users.
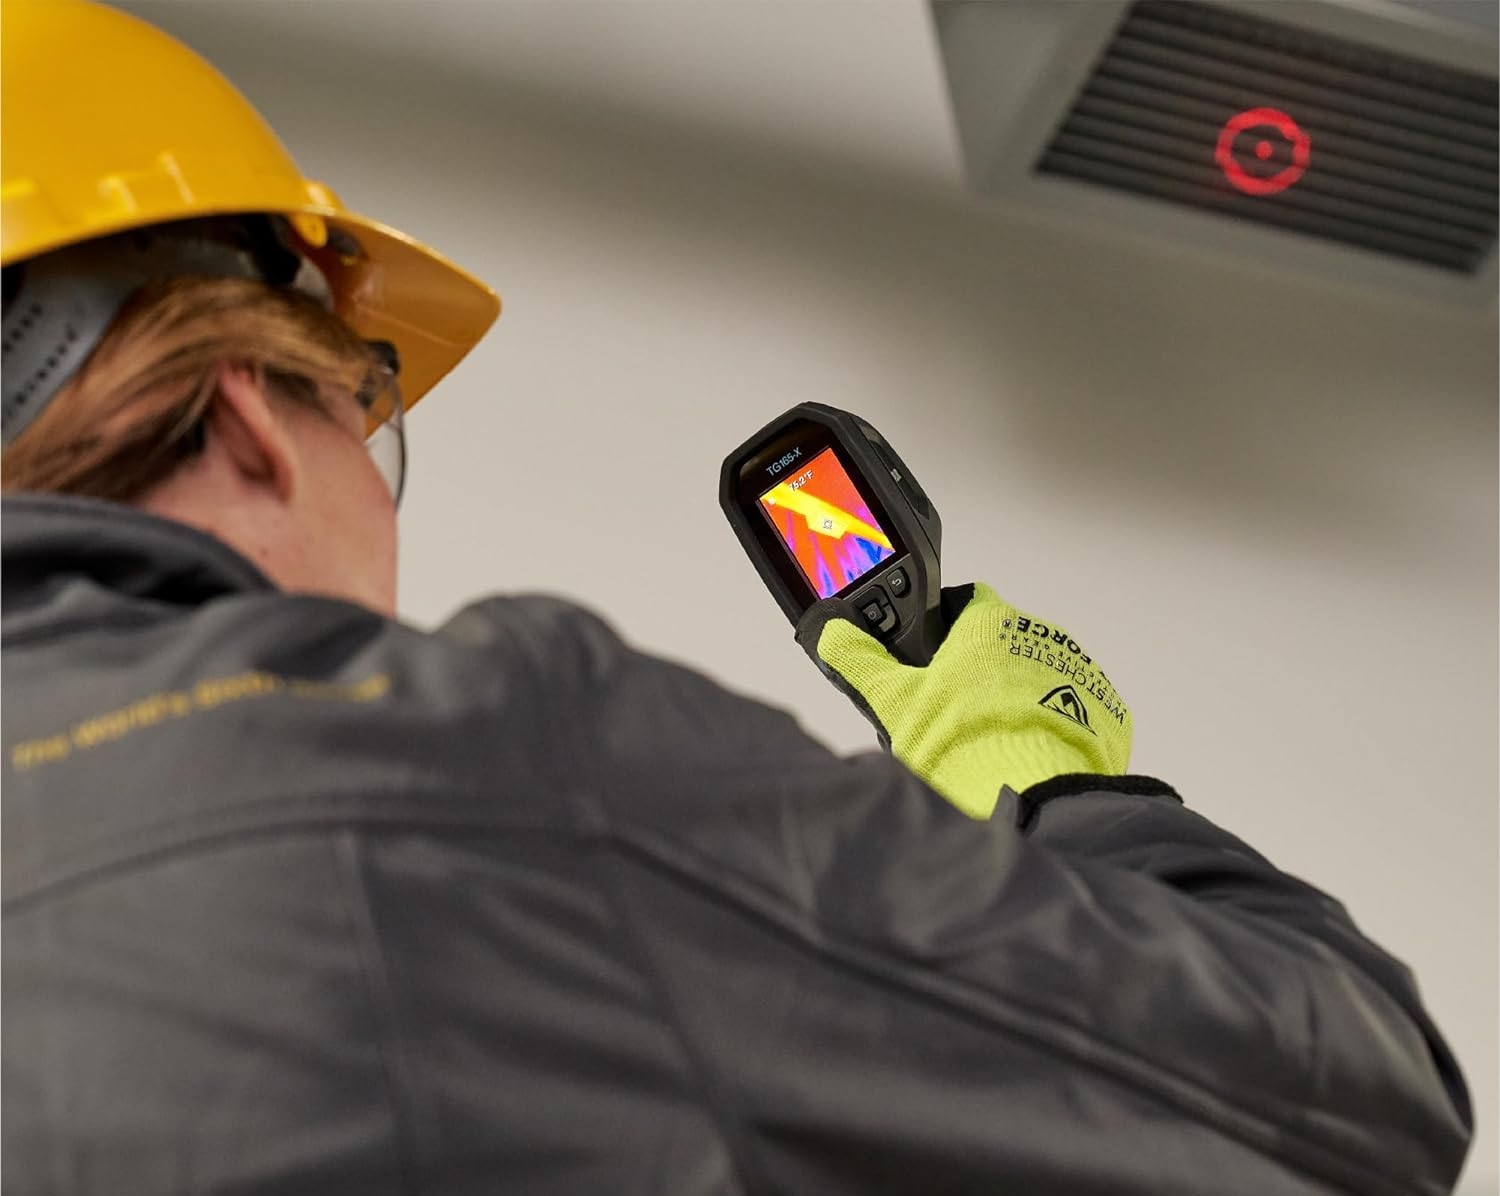
FLIR TG165-X Thermal Imaging Camera


- Features and Specifications:
- Designed for building inspection, HVAC, and electrical use.
- Includes a bullseye laser for precision.
- Pros and Cons:
- Pros: Precision laser targeting, designed for professional use in various applications.
- Cons: May not be as user-friendly for casual home users.
Klein Tools TI250 Thermal Imaging Camera


- Features and Specifications:
- Displays over 10,000 pixels with 3 color palettes.
- Highlights high/low-temperature points.
- Rechargeable and user-friendly design.
- Pros and Cons:
- Pros: Good pixel density for detailed images, easy to use, and rechargeable.
- Cons: Limited advanced features for professional use.
In today’s world, where smartphones are an indispensable part of our daily lives, some thermal imagers are ingeniously designed to leverage this technology. These devices offer a unique blend of convenience and innovation, seamlessly transforming your smartphone into a powerful diagnostic tool.
Klein Tools TI222 Thermal Imager for iOS Devices


- Features and Specifications:
- 10,800 pixels resolution.
- Three color palettes and highlights high/low temperatures.
- Compatible with all iOS devices.
- Pros and Cons:
- Pros: High-resolution imaging, compatible with a wide range of iOS devices.
- Cons: Limited to iOS users, might not cater to professional-grade needs.
FLIR ONE Gen 3 – iOS


- Features and Specifications:
- Compatible with iOS devices.
- Includes MSX Image Enhancement Technology for clearer images.
- Pros and Cons:
- Pros: Enhanced image clarity with MSX technology, portable and easy to use.
- Cons: Limited to iOS users and dependent on phone’s battery.
TOPDON TC002 Thermal Camera for iOS

- Features and Specifications:
- 256×192 IR resolution.
- Compatible with iPhone & iPad, supports video recording.
- Temperature range of -4°F to 1022°F.
- Pros and Cons:
- Pros: High-resolution imaging, wide temperature range, and supports video recording.
- Cons: iOS compatibility may limit user base.
TOPDON TC001 Thermal Camera for Android

- Features and Specifications:
- 256×192 IR high resolution.
- Optimized temperature accuracy, compatible with Android smartphones, tablets, and PC (not iOS).
- Pros and Cons:
- Pros: High-resolution imaging, versatile compatibility with Android and PC.
- Cons: Not compatible with iOS devices, which limits its user base.
Practical Tips for Using Thermal Imaging Cameras at Home
Using a thermal imaging camera around the home can be straightforward, but a few tips can help you make the most out of these advanced tools:
- Conduct Inspections During Appropriate Weather: For the best results, perform thermal inspections on cooler days. The temperature difference between the indoors and outdoors should be significant to accurately detect heat leaks.
- Understand the Color Palette: Familiarize yourself with the color indications of your thermal camera. Generally, areas that leak heat appear warmer (red or yellow) compared to cooler areas (blue or purple).
- Check Common Problem Areas: Focus on areas known for heat leaks, such as windows, doors, attics, and walls. Pay special attention to the corners and edges where insulation might be less effective.
- Use Multiple Angles: Inspect each area from different angles to ensure no heat leaks are missed.
- Take Notes: Record or take snapshots of problem areas for reference during insulation improvement projects.
- Consult a Professional for Major Issues: If significant heat leaks are detected, it might be worthwhile to consult with insulation professionals for comprehensive solutions.

Conclusion
Thermal imaging technology has revolutionized the way homeowners can identify and address insulation issues. With the ability to detect subtle temperature differences, these cameras reveal hidden heat leaks that contribute to energy loss and discomfort in homes. The range of cameras reviewed, from compact models like the FLIR C3-X to more robust options like the FLIR E8-XT, offers a variety of choices for different needs and budgets.
While thermal imaging is a powerful tool, it’s important to remember that it is just one part of a broader approach to home energy efficiency. Proper insulation, regular maintenance, and mindful energy use all play critical roles in creating a comfortable, sustainable living environment. Whether you are a DIY enthusiast or a professional, thermal imaging cameras can be invaluable in helping you improve your home’s insulation and energy efficiency.


